Share

In this case study you'll learn about the TESA TWIN-T10, the portable and accurate solution for on-site servicing of CMMs.

The Portable and Accurate Solution for On-Site Servicing of Coordinate Measuring Machines

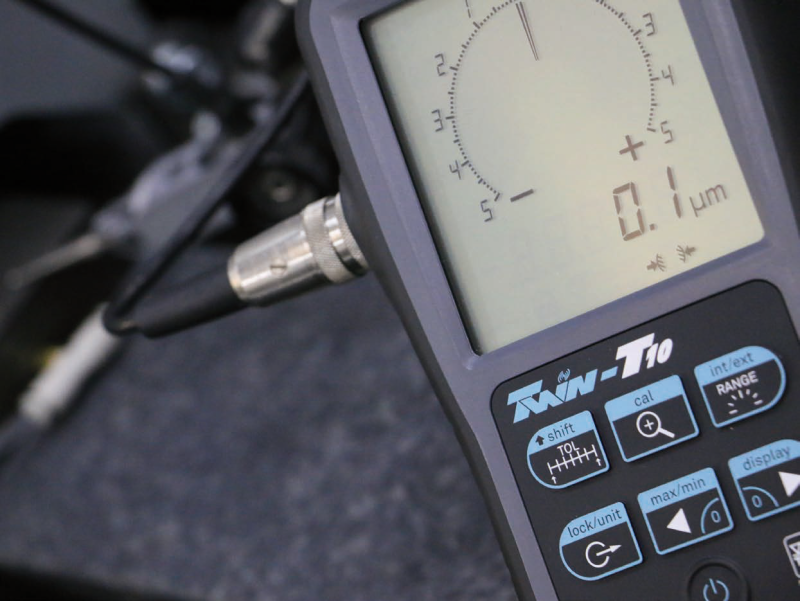
The TESA TWIN-T10 display together with the GT 31 lever probe enables the operator to check and adjust the CMM with sub-micron accuracy according to specifications during installation, calibration and maintenance.

Mechanically aligning the ZX squareness of a GLOBAL CMM with the TESA TWIN-T10.

Hexagon Manufacturing Intelligence service departments worldwide are dedicated to providing outstanding levels of service on every installation and calibration task they come across. Having access to the right tools is a major factor in their ability to deliver such service, and Hexagon engineers are fortunate to have their choice of equipment from inside the company’s own extensive portfolio of equipment, including the TESA range of handheld measurement equipment.

Like their counterparts around the globe, the Telford service team has clear objectives when installing or calibrating a coordinate measuring machine (CMM): accuracy, reliability and time savings.

To make the geometric assessments required to complete the task, the service engineers need a mobile, compact and autonomous solution.

The TESA TWIN-T10 display together with the GT 31 lever probe provides just such a system. They enable the team to check and adjust the CMM with submicron accuracy according to specifications during installation, calibration and maintenance.

The advantages of the TESA TWIN-T10 portable display coupled with GT 31 lever probe for this application include portability, ease of setup, compact size, accuracy, repeatability and stability across various measuring ranges, which combine to speed up the measurements and give confidence in the accuracy of the results achieved.

The portable display has been carefully designed for efficiency and provides effortless reading thanks to the detailed segmentation and the numbering across the scale. The clear tactile feedback of the keypad prevents operating errors, while the TESA TWIN-T10 is also powered by standard AA batteries to offer complete autonomy in use.

Watch the TESA TWIN-T10 in action in this short video.

The 200 segments scale of the TWIN-T10 enables a micron visualization during geometrical measurements.

John Gallon, Service Team Leader in Telford, explains why the device is so useful for his team: “Prior to using the TESA TWIN-T10 we used long-range plunger dial test indicators and lever type dial test indicators with their inherent drawbacks."

"Now, rather than counting revolutions on the plunger dial test indicators and resetting position regularly, we can accurately read the display from a distance. This is very important as the GT 31 probe is mounted on the CMM carriage at a significant height above your head, whereas the TESA TWIN-T10 remains within reach in such a way you can monitor the readings."

“Also, the adjustable lever of the GT 31 enables measurement in hard-to-reach areas of the CMM where a straight pencil-type probe or a plunger of a traditional dial test indicator would not fit or reach,” adds Mr. Gallon. “The time saved with this instrument is based mainly on ease of setup and not having to keep resetting or misreading a plunger-style clock. We are very satisfied with TESA instruments and the quality of these products, which enable our Service Team to complete their work on time and to the high standards that are expected by our customers. No training from TESA was required as the TWIN-T10 display is so logical to use and handle.”

"The time saved with this instrument is based mainly on ease of setup and not having to keep resetting or misreading a plunger-style clock."
John Gallon
Hexagon Manufacturing Service Team Leader, Telford, UK

TESA TWIN-T10 IN ACTION: THREE APPLICATIONS IN CMM CALIBRATION

Application 1:
Checking Air Bearing Lift and Air Bearing Ways

“We have to measure within two microns when checking air bearing lift to avoid the risk of damage to the air bearing way,” explains Gallon. “We use the TESA TWIN-T10 during all CMM installs, service and calibration and any service intervention relating to air bearing functionality. This instrument is ensuring that the accuracy of the CMMs complies with the manufacturer’s accuracy statement so that the customer can have confidence in the reported results produced on their CMM.”

Application 2:
Aligning of Bridge CMM Beams and Bearing Ways

“As you can imagine, hoisting two heavy steel fabricated beams on top of fabricated legs which are two meters high and then aligning the beams parallel and true over five meters or more requires a capable and accurate instrument,” says Gallon. “The time we used to take using a dial test indicator for this alignment has decreased and we can align CMMs with micron accuracy. “The TESA TWIN-T10 gives us the ability to mount a GT 31 probe on a CMM carriage and measure accurately along the full axis of travel, reducing alignment issues from hundreds of microns down to a few, which enables us to maintain our accuracy statement when installing large CMMs.”

Application 3:
Mechanical Alignment of Axis Squareness

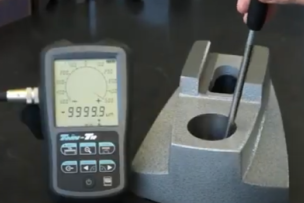
The ZX, ZY and XY axes squareness is also checked with the TESA TWIN-T10 and GT 31 lever probe. This measurement is done by mounting the GT 31 lever probe on the Z axis and traversing the probe in X, Y and Z axes along a granite square reference mounted both vertically and horizontally (depending on the plane to be adjusted) and perpendicular to the Z axis.

Previously Featured on TESA Technology's website.

Talk to Us!

Leave a reply

Your email address will not be published. Required fields are marked *

Established in 1941 and headquartered in Renens, Switzerland, TESA manufactures and markets precision measuring instruments that stand for quality, reliability and longevity.

The TESA brand is the global market leader in the field of height gauges and a pioneer thanks to its wide range of instruments, including callipers, micrometers, dial gauges, lever-type dial test indicators and inductive probes. TESA is a true benchmark for the inspection of incoming goods, as well as for production workshops and quality assurance laboratories.

Through its worldwide distribution network the company focuses on the mechanical engineering, micromechanical, automotive, aerospace, watchmaking and medical industries.

Browse Products from TESA Technology

More on Real-Life Stories

Precision Tool became the “go to” company for solving difficult machining problems for a variety of industries and HAIMER has been a key partner in helping them maintain this competitive edge.

For manufacturers All Axis Robotics and KUKA, the MakerBot’s 3D printer platform has proven to be a key asset across multiple professional applications.

An increase in production orders for new breeds of high-volume and high-value automotive components required OMG to consider alternative approaches to part inspection.

MSC

Signing into Better MRO is easy. Use your MSCdirect.com username / password, or register to create an account. We’ll bring you back here as soon as you’re done.

Redirecting you in 5 seconds