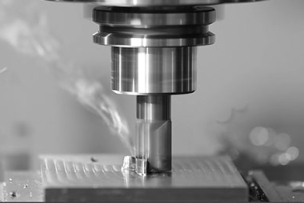
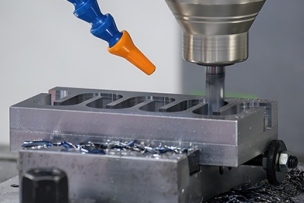
Now JET’s product training manager, he says one of the skills every student needs to master is how to properly tram the head on a manual knee mill.
“Tramming is one of the first things I taught my students,” he says. “Without that, parts won’t be square and holes won’t be straight. Fortunately, it’s not a difficult task, nor does it need to be performed often. Tramming is really only needed after tipping the head to cut an angle, or if you’ve had a hard collision.”
How To Tram A Mill
Tramming starts with removing the vise or other workholding device from the table.
Next, clean chips and oil from the table and ensure the surface is free of nicks or dents. It’s a good idea to lock the table in the center of the X and Y axes (or wherever it is most often used) with the spindle centered directly overhead. That may mean repositioning the head by cranking the ram and turret to their zero positions.
The machine should be level and the power turned off—be sure to follow your shop’s lockout/tagout safety procedures. Place the spindle in neutral so that it rotates freely and be sure to disengage the fine-feed handwheel. Mount a test indicator attached to an Indicol-style universal holder to the quill and be sure the needle sits at 15 degrees from horizontal.
The rest of the process works as follows, according to Holcomb:
- Loosen and then gently re-tighten the four bolts on the head’s front face, on either side of the quill stop. These control rotation around the Y-axis pitch, or its left and right, side-to-side alignment.
- Repeat the procedure with the three bolts directly behind the quill handle, on the right-hand side where the head attaches to the ram. These allow adjustment of the head’s front-to-back rotation in the X-axis, often referred to as “nod.”
- If the head is significantly out of alignment, Holcomb might “rough it in” by extending the quill and checking it with a machinist square. Otherwise, he usually begins the tramming process by truing the Y-axis (side to side), but he says it doesn’t really matter which one is trammed first.
- Return the quill to its uppermost position and gently lock it in place. If using a dial indicator, swing it to the three o’clock position, then bring the knee up until the dial engages by roughly half a rotation. Zero it out, and then bring the indicator to nine o’clock.
- Note the difference between the two readings. Split the difference by turning the adjustment knob (it should be just above and behind the quill handle). Repeat this step until the dial reads zero at the left and right positions. You may need to adjust the knee position up or down to avoid burying the indicator.
- Now adjust the X-axis. It’s the same process, except the indicator readings are made at noon and six o’clock, and the “nod” adjustment is made using the bolt directly behind the head at the top of the machine casting.
The tramming process might need to be repeated several times, alternating between the X and Y axes until both are within the desired tolerance. Holcomb says 0.0005 inch is a good target, but it depends on the accuracy levels your shop requires.
When done, tighten the seven bolts—four in the front of the machine, and three on the side—until snug. Overtightening can lead to thread stripping, followed by a very expensive machine repair, so don’t use breaker bars.
After tightening, swing the indicator in a full circle to make sure nothing has moved. It’s also a good idea to check the quill at this point. If you have a cylindrical square, mount the test indicator to the spindle and run the quill up and down. An angle plate can also be used. In either case, there should be no movement of the dial.
Burning Out Power Feeds
Because milling machine tables have slots for mounting vises and other workholding devices, Holcomb suggests placing a precision-ground circular plate on the table to avoid “bouncing the needle all over the place.”
He also recommends investing in a drop indicator spindle square such as those made by Starrett (other brands are also available). With this, there’s no need to swing a dial indicator back and forth—just crank the adjusting bolts until both dials read zero.
“Once you get good at it, tramming a mill should only take 15 minutes or so,” Holcomb says.
Investing in knee mills with automatic oiling systems can streamline operations, he suggests. Otherwise, be sure to lube the machine according to the manufacturer’s recommendations, change fluids and grease bearings regularly, and keep the machine clean.
“And don’t forget to disengage the table locks when you’re done tramming,” he laughs. “I’ve visited way too many shops who didn’t and ended up burning out their power feeds.”


Talk to Us!
And the grease zers on the knee are for oil!
27You have the axes reversed in the article. Y is front to back, X is side to side.
32Hi William,
You’re right, the X-axis movement is from right to left and the Y-axis front to back, but tramming corrects the rotation around those axes. Imagine mounting a clock on the front of the head, facing the machinist. Its hands (and the head itself) rotate around the Y-axis. Therefore, getting the head perfectly vertical (making the hands at 3:00 and 9:00) means dialing it in from left to right, measuring deviation in the X-axis. So again, tramming the Y-axis requires checking it in the X-axis (side to side), and vice-versa for the X-axis (i.e. must be trammed front to back).
25Leave a reply
Your email address will not be published. Required fields are marked *