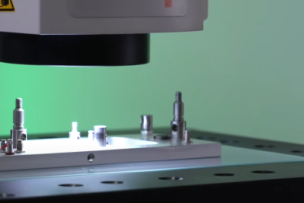
Realistically, form measurement is a process of measuring form deviations. It is traditionally carried out in air-conditioned laboratories by highly qualified specialists, but nowadays it is often carried out directly in production by employees who are entrusted with a wide range of tasks. Whether form or roughness measurement, the procedure is essentially the same. With any surface measurement, many sampling points are typically used to represent the entire surface. These points are then filtered to get only the desired data. For example, in the surface roughness test, the shorter wavelength data is retained for analysis while the shape-related data is discarded because that information is not needed. In contrast, in form measurement, the short wavelength data is filtered out to measure the long wavelength data representing the form. This is where many users make their first mistake: the fine nuances of filtering are not always easily understood and therefore often the wrong filters are chosen.
The form measurement filters are confusing to many metrologists. Thus, millimeters or inches are used when speaking of surface roughness measurement. If the filter is set to 0.8 mm, it is generally understood that surface deviations of less than 0.8 mm are regarded as surface roughness while elements of more than 0.8 mm are seen as form errors of the surface.
However, form filters for roundness measurements are usually given as an angular size rather than length or distance. To make things even more confusing, data in the specifications are not made directly in degrees, but in units called "undulations per revolution" or upr. Many users choose 50 upr as the typical default value. This means that the length of the filter is 1/50th of a circle – that is 7.2 degrees.
Considering the workpiece diameter for filter selection
However, the arc length, which corresponds to 7.2 degrees on the surface of a round object, changes with the diameter (d) of the object. A simple formula for the circumference of a cylinder is: π * d. So a 4mm diameter cylinder would have a circumference of 12.57mm – and therefore 7.2 degrees would cut out an arc length measuring 0.25mm along the surface. On the other hand, if a cylinder with a diameter of 20 mm was to be measured, this would have a circumference of 62.83 mm and the 7.2 degrees would correspond to an arc length of 1.26 mm. Thus, maintaining the same 50 upr filter setting on the meter will, in the case of the larger part, account for five times larger surface deviations than the boundary between the features of shape and surface roughness. With virtually all gages, you can easily change the filter setting by clicking a button in the software – but many do not understand the meaning of upr and therefore do not change the default settings.
The opposite also sometimes holds true: if there is a lack of understanding that the filter setting has a significant impact on what is filtered out or maintained for analysis, metrologists may be tempted to choose a different setting. However, a different value would change the results, leading to a result that looks "better," but is not really accurate for the size of the sample. The bottom line is that the filter should be set correctly for the respective measurement object.
Wrong size of probe element
A second, very common mistake is that users rely on one single probe size to measure all parts, regardless of the size of the test specimen. In fact, the probe ball itself represents a mechanical filter which should be selected according to the workpiece size and the maximum measurable number of undulations per revolution.
The problem can be clearly illustrated using the example of a small component with a diameter of 4 mm: If the measuring surface is traced with a probe element that is too large, it cannot move well along the surface and precisely follow the ups and downs of the peaks and valleys. If stylus elements are closer to the size of the workpiece diameter, it becomes very difficult to obtain a good surface evaluation. In this case, the use of this probe element causes mechanical filtering – even before any mathematical filtering takes place. The VDI / VDE 2631 Sheet 3 gives the user a guideline for selecting the correct probe element based on the upr settings, the maximum expected single wave depth and the workpiece diameter.


Talk to Us!
Leave a reply
Your email address will not be published. Required fields are marked *