Share

Today’s manufactured components are more complex than ever. This is driving a need for increased quality control and the implementation of Geometric Dimensioning and Tolerancing (GD&T) and other metrology processes into the manufacturing process.

Challenging the Measurement Status Quo

Today’s manufactured components are more complex than ever, with more parts diversity, more model year changes and tighter tolerances than ever before. This is driving a need for increased quality control and the implementation of Geometric Dimensioning and Tolerancing (GD&T) and other metrology processes into the manufacturing process. And, with demands to produce parts even cheaper and faster, manufacturers are taking a new look at where the components measurement process should happen.

Traditionally, components manufacturers have relied on a measurement process in which skilled operators use computer-controlled equipment to validate randomly selected parts in batches, usually post-production and offline in a quality laboratory or other controlled environment.

Sometimes referred to as “tailgate measurement,” this process can be problematic. When the process includes frequent stops to move parts to the lab for validation, it can create bottlenecks and add significantly to total manufacturing time. On the flip side, less frequent measurements can create waste, as batches of parts that fail validation must be scrapped. It can also create the need for manual adjustments, adding the risk of human error.

Manufacturers are seeking a more streamlined and speedy measurement process.

Now, with historic shortages of skilled labor and resources—and as the Internet of Things (IoT) brings increased connectivity—manufacturers are seeking a more streamlined and speedy measurement process, one that eliminates the need to move parts away from the production line for verification and reduces the time required for fine-tuning machining.

Moving Inspection to the Shop Floor

The Benefits

The time has come to move quality parts measurement to the production point. The push for this new paradigm originated with aerospace, automotive and medical device manufacturing, industries that need to achieve 100% parts inspection, with real-time feedback for quick corrective actions. Now, nearly every industry is looking to accelerate the manufacturing process to realize these same benefits.

Moving measurement closer to the point of production speeds up the quality assurance process, provides real-time feedback, and provides a foundation for integrating automation and robotics into the process. In fact, the implementation of in-line or near-line measurement is quickly becoming an essential tool for manufacturers, emerging as the new standard for the smart factory.

In the end, of course, the objective is to improve quality by increasing the frequency of inspections and decreasing the time of inspection throughout the production process. Positioning inspection capabilities in or near the production line enables verification of 100% of components, rather than the sample rate that results from the tailgate measurement process.

After all, when parts are inspected more often, there are fewer issues and challenges encountered during the production process. And, a process that provides the ability to detect issues with parts faster—and to correct them quickly—results in fewer parts that are scrapped. With less waste, material costs and delays are reduced.

The more complex the part, the greater the need for flexibility in the measurement process.

Meeting the Challenges with CMMs 

While in-line/near-line inspection is fast becoming the new standard, manufacturers are encountering challenges in their efforts to integrate it into their production processes. These challenges include lack of space available for installation of an additional piece of equipment, day-to-day manufacturing floor temperature variances that can affect the repeatable accuracy of the equipment, and vibrations from the constant traffic of port trucks on the shop floor. Dust, debris and other contaminants—another unavoidable fact of life in industrial environments— can also affect the accuracy and reliability of these extremely delicate technical instruments.

Because many production facilities operate around the clock, the ability of the equipment to provide 24/7 uptime for constant measurements is another major concern. Just-in-time manufacturing—in which multiple product types are manufactured simultaneously—adds additional complications.

First is the need to measure multiple parts without slowing down the production line, followed by the challenge of frequent, significant resets.

Today’s components are more complex than ever. The more complex the part, the greater the need for flexibility in the measurement process. By bringing these capabilities to the shop floor, manufacturers can more easily and quickly change setup and make design changes to improve the component. Today’s flexible coordinate measuring machines (CMMs) can often change setup in a matter of hours.

Many CMMs are now available that can meet the challenge of today’s fast production rates. Their smaller footprints make it easy to mount them in challenging locations on the floor—some inside CNC machining center enclosures—or with open-air designs on multiple sides that make it easy to integrate them into parts handling systems and for operators to use.

Download a PDF to continue reading this white paper and find out how you can successfully transition to real-time inspection and measurement on the shop floor.

Previously Featured in Quality Magazine.

Talk to Us!

Leave a reply

Your email address will not be published. Required fields are marked *

Headquartered in Aurora, IL, Mitutoyo America Corporation is the world's largest provider of measurement and inspection solutions offering the most complete selection of machines, sensors, systems and services with a line encompassing CMM (coordinate measuring machines), vision, form and finish measuring machines, as well as precision tools and instruments, and metrology data management software. Mitutoyo's nationwide network of Metrology Centers and support operations provides application, calibration, service, repair and educational programs to ensure that our 8,500+ metrology products will deliver measurement solutions for our customers throughout their lifetime.

Browse Products from Mitutoyo

More on Metrology

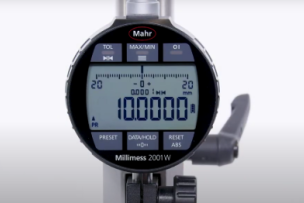
Mahr's Millimess 2001 W dial comparators feature a unique inductive measuring system that provides more precise measurement than ever before.

This whitepaper explores four areas where manufacturers can reduce their operating costs by changing the way they control their machining processes.

Identifying broken tools during the machining process is crucial to avoid excessive rework and the scrapping of components.

MSC

Signing into Better MRO is easy. Use your MSCdirect.com username / password, or register to create an account. We’ll bring you back here as soon as you’re done.

Redirecting you in 5 seconds