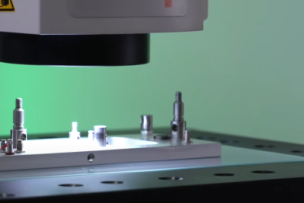
Perforated diaphragm filters stray light
The MarSurf CM explorer from Mahr is used in Volkswagen's surface metrology as a flexible instrument especially when surface information is required. This involves a precise view of the details of a surface – and not just a profile section, as is the case with tactile measurements.
The optical measuring method of the CM explorer is based on confocal microscopy technology. The special feature: Mahr's instrument filters out the scattered light reflected from the object surface via a rotating pinhole disk. In this way, only the surface points on the CCD chip of the camera that are exactly in focus are imaged. Blurred pixels are faded out. In the first step, a high-contrast and sharp image of the respective surface in a clearly defined horizontal plane is made.
In order to create an assessable three-dimensional reconstruction of the surface (relief), the measuring device automatically changes the focus within the measurement – and thus generates a series of images on different focal planes with the corresponding contour lines.
Layed on top of each other, the result is a three-dimensional image with a resolution that makes structures visible even in the nano range. On average, an image stack consists of 200 to 400 individual images that are captured within a few seconds and converted into a three-dimensional height image by the measurement software. "We don't create images, we create reliefs," emphasizes Stefan Rubach.
High resolution even on large areas
With the MarSurf CM explorer, the internal testing laboratory of Volkswagen engine development at the Wolfsburg location is in a position to literally search for clues. With its 20x magnification, the standard lens covers a measuring spot of 0.8 x 0.8 millimeters. If larger areas are required, the CM explorer has a so-called stitching function. It combines adjacent individual images to form an overall image – similar to a panorama image. This means that even large areas can be analyzed with the highest possible resolution. Mahr's solution thus lives up to its name "explorer": "With many measurement jobs, neither the developer nor we know what to expect," says Rubach describing the subsequent voyage of discovery.
To ensure that measurement results are comparable, repeatability is also important in confocal metrology. This is particularly true when different employees carry out measurements in everyday laboratory work. "Metrology has a lot to do with trust. Trust in the technology and in the employees who work with it," Rubach is convinced. The simple operability of the hardware and software is therefore of central importance to Rubach in order to avoid user errors. But even components that have not been completely cleaned before the examination falsify the results by dirt deposits or dust. For this reason, the hardware of the MarSurf CM explorer is particularly robust.
More reality in development
The measured topographies can be used as test reports in PDF format for further analysis. However, the developers at Volkswagen use the raw data from the surface measurements to integrate the measurement results into their simulation processes. With the help of this unfiltered data, functions and behavior can be accurately predicted during a simulation. Rubach and his colleagues can therefore work very closely with reality. “In the past, calculation models had to be created, but today we have real surfaces and their behavior available in the simulation,” explains VW measurement engineer Rubach. And he continues, “We are developing much closer to reality.”
Previously Featured on Mahr's blog.
Browse Mahr's line of dimensional metrology equipment on MSCDirect.com.


Talk to Us!
Leave a reply
Your email address will not be published. Required fields are marked *