Share

Understanding the different hardness testing types and systems can be useful to determine an optimal solution.

John Richardson, Product Coordinator, The L.S. Starrett Company 

Understanding the different hardness testing types and systems can be useful to determine an optimal solution. Hardness testing functionality has evolved and now users can dial into world-class caliber instrumentation which more closely aligns with their applications at hand.

Hardness Testing Defined

One of the most common indentation hardness tests used today is the Rockwell hardness test, and although less widespread, the Brinell and Vickers hardness tests are also utilized. The majority of indentation hardness tests measure the deformation that occurs when the material being tested is penetrated with an indenter. Two levels of force are applied to the indenter at specified rates and dwell times when performing a Rockwell hardness test. This is different than the Brinell and Vickers tests, where the size of the indentation is measured after the indentation process. The Rockwell hardness of the material is based on the difference in the depth of the indenter at two specific times during the testing cycle. The value of hardness is calculated using a formula that was derived to yield a number falling within an arbitrarily defined range of numbers known as a Rockwell hardness scale.

Regardless of the Rockwell scale or indenter being used, the overall Rockwell test procedure is the same. The indenter is brought into contact with the material to be tested, and a preliminary force (a.k.a. the minor load) is applied to the indenter. The preliminary force is usually held constant for a set period of time (dwell time), after which the depth of indentation is measured. After the measurement is made, an additional amount of force is applied at a set rate to increase the applied force to the total force level (a.k.a. the major load). The total force is held constant for a set time period, after which the additional force is removed, returning to the preliminary force level. After holding the preliminary force constant for a set time period, the depth of indentation is measured a second time, followed by the removal of the indenter from the test material. To calculate the Rockwell hardness number, the measured difference between the first and second indentation depth measurements, "h", is used.

If using an older Rockwell hardness system, the operator may have to manually control most or all of the test procedure steps. The majority of today's newer machines automatically perform the entire test. Also, when leaving a mark or indentation is not an option, non-destructive ultrasonic technology can be used.

Rockwell Hardness     

When testing the hardness of carbon steel, alloy steel, cast iron, nonferrous metals and engineering plastics, Digital Rockwell Benchtop Hardness Testers can be used to directly measure in the most popular regular Rockwell hardness scales and can quickly convert that hardness value into HB, HV, HK and many other scales. Desirable hardness tester features include the ability to obtain ultra-precise results, a wide measuring range, and scale/selectable test force capabilities. Also, automatic main test force loading/unloading, a high-resolution digital display and USB data storage are all very advantageous.

A user-friendly touchscreen interface can speed operations and the ability to use USB output to a flash drive is excellent for data mobility. There are options to apply the weight load such as on digital systems that use weights to apply the load or use a closed loop load cell to apply the weight load. The latter affords greater precision and repeatability. With a weight loaded system, the level of the machine is of great importance, so that the weights drop correctly. This is a less critical matter when using a load cell system.

Conforming to ASTM E-18 Superficial Rockwell Hardness standards, hardness testers in this category offer excellent repeatability in all Superficial Rockwell Hardness scales. Superficial Rockwell hardness testing is designed for very thin and soft workpieces. The systems are ideally suited for a wide range of environments including inspection labs, heat treat facilities, tool rooms, workshops and laboratories. For more versatility, twin hardness testers are capable of testing in all of the regular Rockwell and Superficial Rockwell hardness scales.

Dolphin nose systems allow for the hardness testing of inner, as well as exterior, diameters. The systems are generally larger in size than other Bench Rockwell systems, offering greater testing heights and depths. Dolphin nose models offer a manual handle that activates the preload system, or an advanced Auto Z-axis preload system. Using the Auto Z-axis preload system, after placing the workpiece in testing position, the operator only needs to press the start button for the machine to complete the testing process.

Starrett Hardness Tester 3832

Brinell Hardness

Brinell hardness testing is commonly used for very large, porous testing of less hard metals, such as castings. Benchtop systems available today can handle the most popular Brinell hardness applications, and incorporate the latest innovative closed-loop technology. A test load is applied via a closed-loop control unit with a load cell to apply weight loads up to 3,000kg, a DC motor and an electronic measurement and control unit. The result is highly accurate Brinell hardness measurements at all test loads up to 0.5%. A common load overshoot or undershoot, also known as traditional dead weight or open-loop, system is eliminated. The absence of mechanical weights not only eliminates friction problems but also makes the equipment less sensitive to misalignments caused by vibrations. The systems are ideal for laboratories, workshops, tool rooms and inspection labs.

Software-driven digital optical systems offer advantages over manual microscopes that are supplied with several hardness testing machines. Connected to a PC, laptop or tablet, the operator can push a single button to take automatic and instant measurements. All graphics can be saved, along with test results, in either Word or Excel formats.

Vickers/Knoop Hardness

Micro Vickers/Knoop Hardness Testers are cost-effective options in Vickers hardness applications, that are ideal for those who do not perform high-volume testing each day. Testing is done on extremely thin/small workpieces, and often used for checking the hardness of layers, or platings and coatings on small parts in a laboratory environment. A high level of preparation is needed for such testing, including but not limited to, a high degree of polishing.

There are three types of turret control including a basic manual turret for changing from optics to indentation and back to optics for measuring. A second type incorporates an automatic turret, giving operators greater freedom to change the turret position by a button on the tester keypad. The most popular Vickers/Knoop Hardness Testers have a turret control option using software to control the entire test with a one-click process using calibrated auto edge detection. Precision video and measurement software also allows for clicking of the indent edges in software, then deriving a hardness reading on screen. 

Designed for the accurate hardness testing of small precision parts, thin materials, case-hardened layers and all sorts of steel components, Macro Vickers Hardness Testers utilize larger weight loads of up to 50kg. This type of test bridges the gap between the superficial Rockwell and micro Vickers machines. These systems have a manual turret.

Shore Testers (Durometers)

Shore Portable Hardness Testers are targeted for testing materials such as rubber, soft plastics and leather, and versions are also available for the testing of hard plastics such as bowling balls and hard hats. Electronic Durometers for measuring Shore A and Shore D values are designed to fit comfortably and firmly in a user's hand. A large LED display and simple three-button control make this device easy to use.

Portable Hardness Testers

There are two popular digital methods of portable hardness testing. The first is "Dynamic Impact", based on the Leeb principle of hardness, developed by DietMar Leeb in the 1970s. A spring-loaded impact body is thrust to the test surface, affecting rebound. Initial thrust and rebound speed is measured in a non-contact mode, and is calculated as a Leeb hardness value and then automatically converted to Rockwell C, B, Brinell, Vickers and Shore Values. Also, the portable benefit means the tester can be brought to the workpiece, which is especially useful when testing large and/or cumbersome parts. This method has resulted in efficient, fast and accurate portable hardness testing results.

However, when a mark or indentation on the workpiece must be avoided, ultrasonic testing is a great solution. Advanced Non-Destructive Portable Hardness Testers utilize ultrasonics with Ultrasonic Contact Impedance (UCI) technology, enabling a portable hardness tester to test special surfaces on small and thin workpieces without marking the surface. These units can test metals as thin as 2mm throughout all scales, hard or soft. UCI technology is available on both manual and motorized systems. The motorized probe systems are used for very thin testing of coatings and platings, or surfaces with a very high polish finish.

UCI is based on a 136 degree diamond at the end of a vibrating rod being depressed into the test surface at a fixed load. The difference in Ultrasonic vibration frequency is then calculated into a hardness value. The UCI test procedure is slower than the Dynamic Impact style; however, the UCI method has the advantages of being non-destructive and able to test thin and small work parts.

Previously, destructive indentations made on such sample pieces meant the garbage heap for those tested. Using Ultrasonics, this is no longer the outcome. These systems have an open architecture and can be calibrated to read any metal, in any hardness scale, with reference samples to perform initial calibration. Ultrasonic portable hardness testing is ideal for applications such as bearings, pistons and valves, among many others. Key industries for this type of testing include aerospace, automotive and medical parts as well as knife blade manufacturing, to name just a few.  

Talk to Us!

We were considering to buy a hardness tester for more accurate measurements in aluminum extrusions (profiles). The profiles a typically hollow and have walls of 1/16" to 1/4" thickness, or sometimes they are solid. We currently use the handheld Webster hardness meters, in the range from 4 to 20 Webster hardness, but sometimes we need more accuracy and repeatability of the measurements. What kind of hardness tester would you recommend?   Thanks,

33  

We have 2 bench top units in stock that can do that. MSC# 92494990 is a dial analog tester and MSC# 92944982 is the same tester with a electronic gage in it. Both will read in Rockwell e scale for the aluminum. The E scale can be converted to Webster in the link below.

https://images-na.ssl-images-amazon.com/images/I/81gspE-9J1L.pdf

Also, i would suggest the 1/8" ball penetrator to get to the E scale MSC# 83982983

Fell free to contact me with questions or our customer care team @ 800-645-7270 If you would like Price and Availability. 

27  

Leave a reply

Your email address will not be published. Required fields are marked *

Making America Strong

Located near the birthplace of the American industrial revolution, ingenuity has been an ever-present factor in the success of making high-quality tools at Starrett. With nearly 150 issued patents, a skilled workforce and a 535,000-square-foot complex housing conventional and advanced equipment, manufacturing excellence driven by innovation endures.

In 1880, Laroy Sunderland Starrett invented and made the world’s first combination square in Athol, Massachusetts U.S.A. 140 years later in 2021, in the same location, the company launched a Data Collection System (DataSure 4.0) that is a quantum leap forward in technology, data security and scalability. With five manufacturing plants in the U.S., Starrett exemplifies a strong U.S.-based manufacturing company investing in the future of America. Starrett is the only American manufacturer of many precision hand tools, including mechanical micrometers, mechanical dial calipers and electronic specialty micrometers.

Starrett has a legacy of providing solutions to complex measuring challenges.  From specifying the correct product to customizing existing tools to complete design and build of specialty gages, Starrett’s got you covered.  

Browse Products from Starrett

More on Metrology

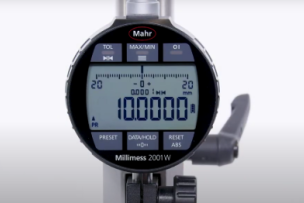
Mahr's Millimess 2001 W dial comparators feature a unique inductive measuring system that provides more precise measurement than ever before.

This whitepaper explores four areas where manufacturers can reduce their operating costs by changing the way they control their machining processes.

Identifying broken tools during the machining process is crucial to avoid excessive rework and the scrapping of components.

MSC

Signing into Better MRO is easy. Use your MSCdirect.com username / password, or register to create an account. We’ll bring you back here as soon as you’re done.

Redirecting you in 5 seconds