It’s certainly not news that more and more gages are being forced out onto the shop floor. Tight tolerance measurements that were once performed by a trained inspection technician are now being done right next to the machining center, most likely by the machine tool operator.
Like every other function in modern manufacturing operations, inspection is subject to management efforts at cost control or cost containment. It’s good business sense to try to maximize the value of every dollar spent, but it means that hard choices must be made when selecting gaging equipment. Issues as diverse as the machinist/inspector and his training, warranties, throughput requirements, manufacturing methods and materials, the end-use of the workpiece, and general company policies on gaging methods and suppliers may influence both the effectiveness and the cost of the inspection process.
Standard off-the-shelf gaging may not be the best choice for specific inspection processes at the machine, or for best throughput by the operator simply because a gage that was good for the inspector in the receiving room is not apt to be the best gage solution for the machine operator at his or her station.
The question for the manufacturing engineers who have become more responsible for quality issues is how do they specify the gaging solution that provides the best (fastest, most reliable, easiest to use, and cost effective) results. Since the manufacturing engineers are most likely not gaging experts they will often rely on a gage supplier to recommend a standard, modified or custom gage solution.
In order to make a proper recommendation, the gage maker is apt to need answers to a number of questions. These are pretty basic, but the answers will usually steer you and the gage builder towards hardware capable of performing the tasks at hand. Here’s a baker’s dozen of key factors to consider:
Part feature, dimension and tolerance to be inspected. Is it flat, round or otherwise? ID or OD? Is it a static or dynamic check? Where is it and is it easily accessible, or is it next to a shoulder, inside a bore or a narrow groove? Is it critical or just nice to have?
Workpiece material and finish. Is the part compressible? Is it easily scratched? Many standard gages can be customized to avoid such influences. Or proper contacts can be chosen to reduce scratching or picking up material.
Accuracy required for the inspection. There should be a reasonable relationship between part tolerance and gage accuracy—very often on the order of a 10:1 ratio, although a resolution and repeatability requirement for statistical gage repeatability and reproducibility (GR&R) testing may require 20:1.
Type of gage you think you need. Do you want to bring the gage to the part or the part to the gage? Do you want to try for multiple checks with one operation?
Time and throughput. How many parts are produced per hour, shift, or day? Can the operator be expected to measure this many parts—or is there a chance of physical harm in trying? Fixed purpose-built gaging may seem less economical than a more flexible, multi-purpose instrument, but, if it saves a thousand hours of labor (or possibly injury) over the course of a production run, it may pay for itself many times over.
Ease of use, and training. Does the operator have the time or skill to manipulate the gage or part? Or does the gage need to be designed to accept the part only in one easy to load process? Especially for shop floor gaging, you want to reduce the complexity of gage operation and the possibility of operator influence.
Part cleanliness. Is the part dirty or clean at the stage of processing when you want to measure it? That may affect labor requirements, maintenance, and the level of achievable accuracy, or it might steer you toward air gaging, which tends to be self-cleaning.
Gaging environment. Will the gage be subject to vibration, dust, changes in temperature, etc.? Is the part warm when it comes off the process? Are the tolerances tight enough to think about temperature compensation?
Parts handling. What happens to the part after it’s measured? Are bad parts discarded or reworked? Is there a sorting requirement? Do you need to have the operator make this decision, or may the gage do so as part of an automated process?
Manufacturing process. Every machine tool imposes certain geometric and surface finish irregularities on workpieces. Do you need to measure them, or at least take them into consideration when performing a measurement? Is the surface finish or form not in line with the part tolerance?
Inspection costs. These increase sharply as gage accuracy improves. Before setting up a gaging operation for extremely close tolerance, verify that the particular level of accuracy is really necessary.
Budget. What do you have to work with? What is the cost of a bad part getting through? If it is a life critical component, don’t be penny wise and liability foolish.
Cost of maintenance. Can the gage be maintained, or is it a throwaway? How often is maintenance required, and who’s going to perform it? Gages that can be reset to a master to compensate for wear are generally more economical over the long run than those that lose accuracy through extended use.
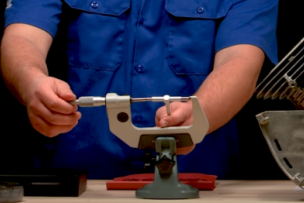
If the part is simply an OD with a generous tolerance, then a caliper, micrometer, or even a dedicated snap gage would be potential solutions. However, if your key factors include performance (accuracy and repeatability), time and throughput, ease of use and operator skill, assured part classification, and cost per piece, then a custom gage solution is one that should be considered.
Often custom gaging is thought of when a solution is needed for a high precision, tight tolerance part. But things can get complicated: there may be more checks; they may not be ODs or IDs; the process being checked might be automated and a gage user may not exist. You may even have a fairly wide tolerance but the feature being checked is so difficult that any user—even the most skilled—would be unable to make accurate and repeatable measurements. Along with the gage, you need to consider part staging.
In any case, if you can’t express what, where, how and why you want to measure something, then your knowledge is insufficient to determine an optimum solution. Find the answers to the questions above and you can start speaking the language of measurement.


Talk to Us!
Leave a reply
Your email address will not be published. Required fields are marked *