Getting Started with Cost Allocation
Administrator access is necessary to manage setup for Cost Allocation on your account. If you do not have Administrator access to set up this functionality please contact our eCommerce customer support team at 800-753-7970 or customercare@mscdirect.com we're happy to help. if you need to have administrator access established for your account.
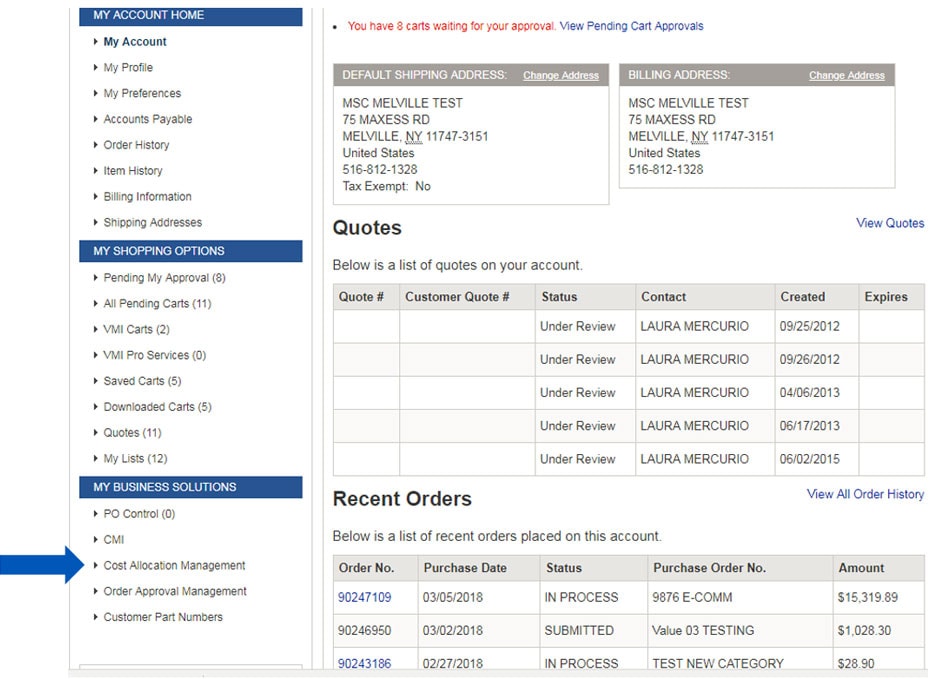
Log in with an administrator's account and select "Cost Allocation Management" from the left navigation bar under My Business Solutions.
Cost Allocation Settings
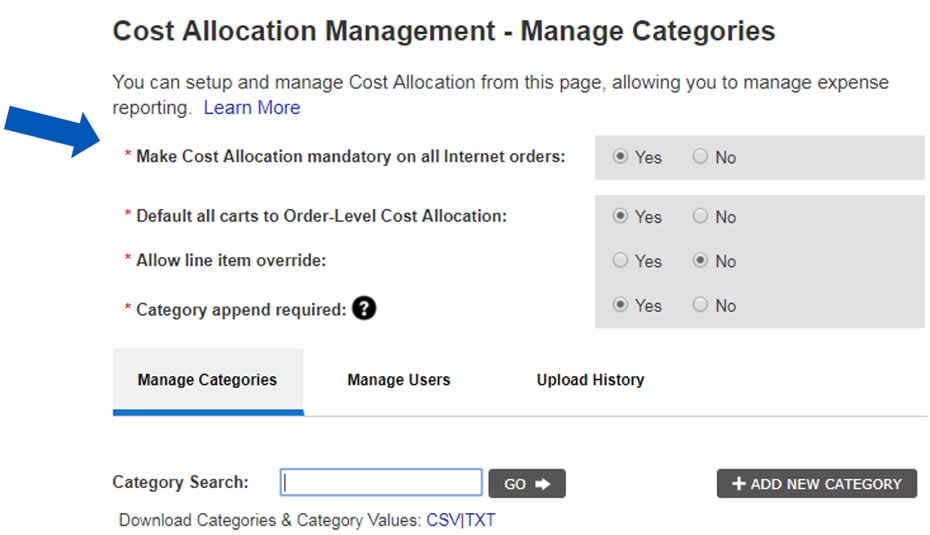
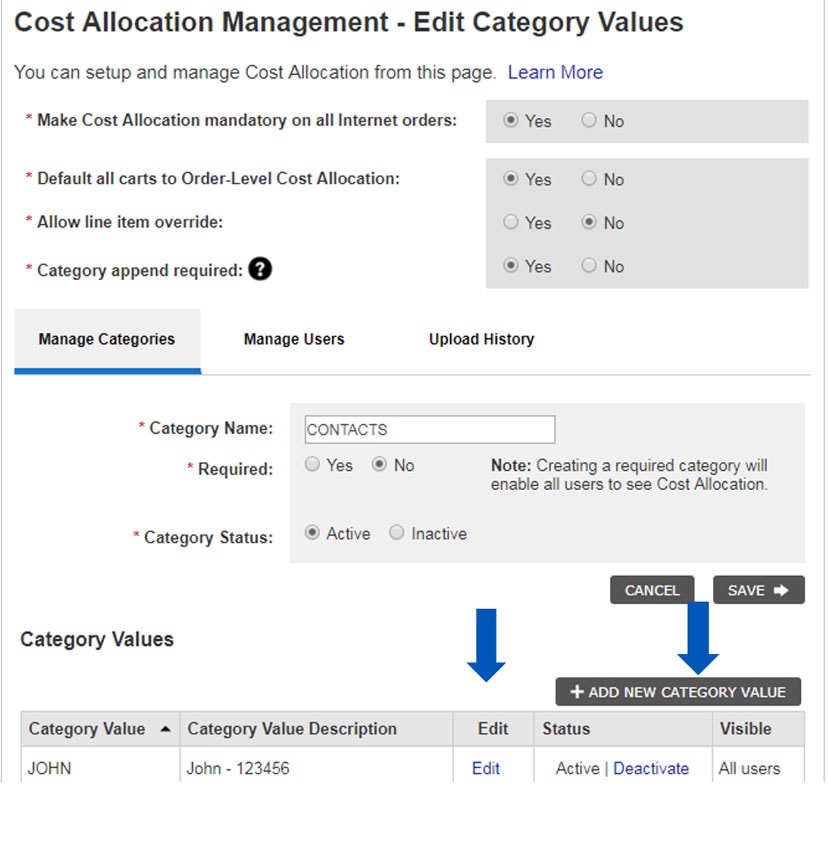
Make Cost Allocation mandatory on all internet orders
Will force the use of cost allocations for all users. This is beneficial for auditing purposes and reporting. If you do not want to enforce Cost allocation for all users, simply select no.
Setting Order Level Cost Allocation Defaults
Setting the Order Level Default to Yes will allow for the cost allocation to be active in the shopping cart and will default all items to the Category and Values selected for a specific user.
Allow Line Item Override
Allowing Line Item Override allows users to make changes outside of Order Level and defaulted categories and values.
Category Append required
Category append was created to allow customers to carry the line item coding to the credit card companies via the PO field. Selecting category append will override the PO field at the account level for all orders using Cost Allocation. The Category Append functionality will concatenate all active categories and populate them into the PO field (up to 17 characters).
Download Categories and Category Values
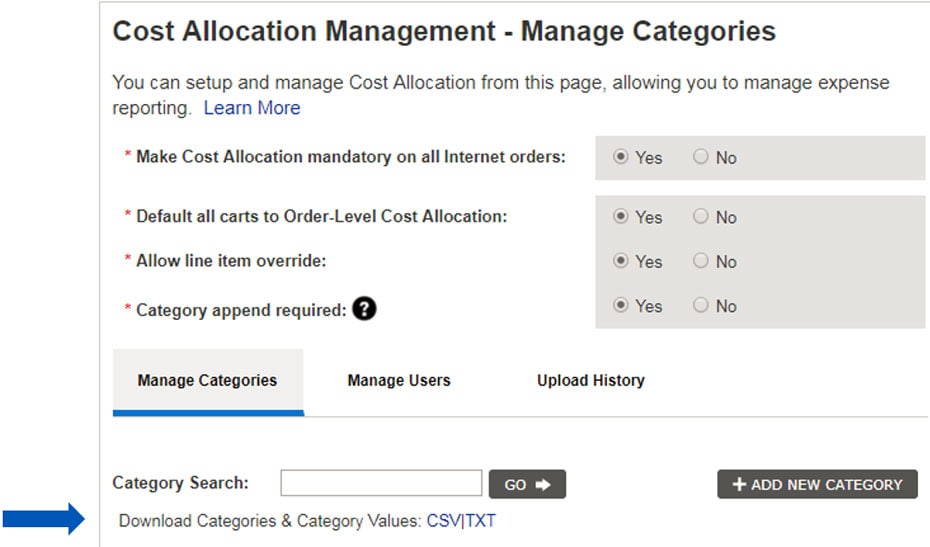
Downloading of categories and category values is functionality that can be utilized to create a report via CSV file or TXT file. This report is useful for a bird's eye view of users and what category and category value assignment users may have or need changed.
Fields include: Category, whether or not it's a required category, the category status (active/inactive), category value, category value description, category value status (active/inactive), category value visibility, web ID, user name, whether or not cost allocation is visible during checkout, and what users can see the cost allocation screen during checkout.
Setting Up a Category and Value
What is a Category and a Category value?
Using a file cabinet as an example: a Category should be a generic label you use to identify your Category Value. A file cabinet drawer for example would be the generic label, the Category Value would be the folders within that drawer.
Category: DEPARTMENT Category Value (folder): FACILITIES, MANUFACTURING, etc.
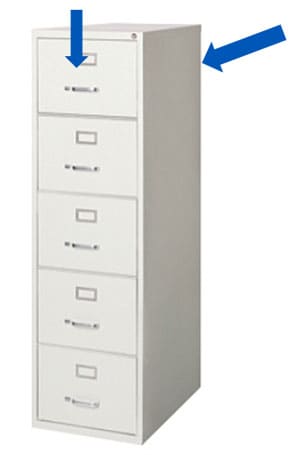
Categories are limited to 5 active at any given time (drawer), Category Values are unlimited (file folders within that drawer).
To set up Categories and Values, select "Add New Category."

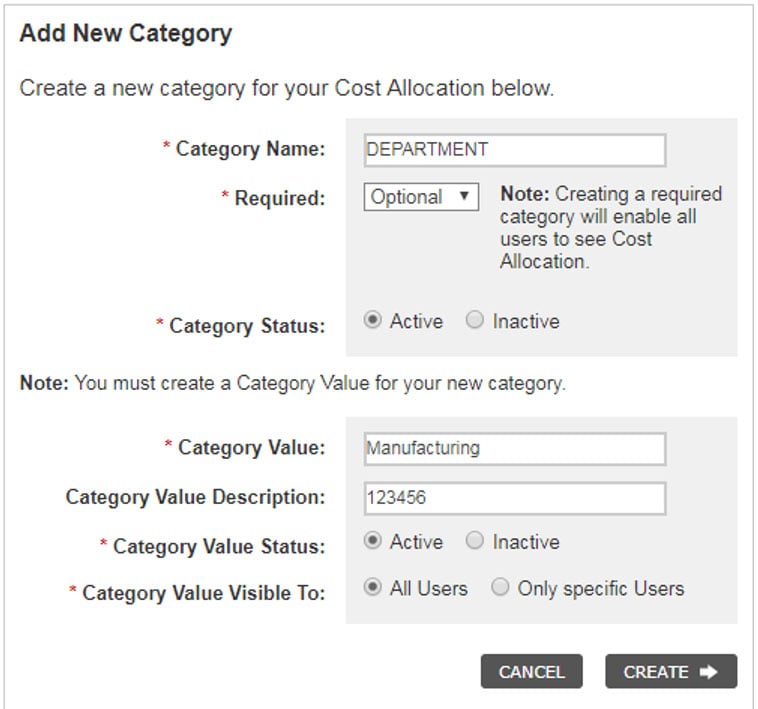
Add New Category
In the example below, the category name is Department. Assign your first value to this category that corresponds to a department in your organization (i.e: Manufacturing). The Category name, Value name and Value description can be alpha or numeric. At this point you can make this category active or inactive, which will indicate if it is needed during the order process.
Note: you can have many categories but only 5 categories can be active at a given time. We will prompt you during setup to correct this if necessary.
Category Value Visible To
Category Value Visible To is functionality which will allow you to control who will be utilizing and have visibility into the Categories and Category Values which have been created. It will be defaulted automatically to All Users. Should you need to limit to Specific Users select the radio button associated with Specific Users. Then select the Create & Add Restrictions button which changes once Specific Users is selected.
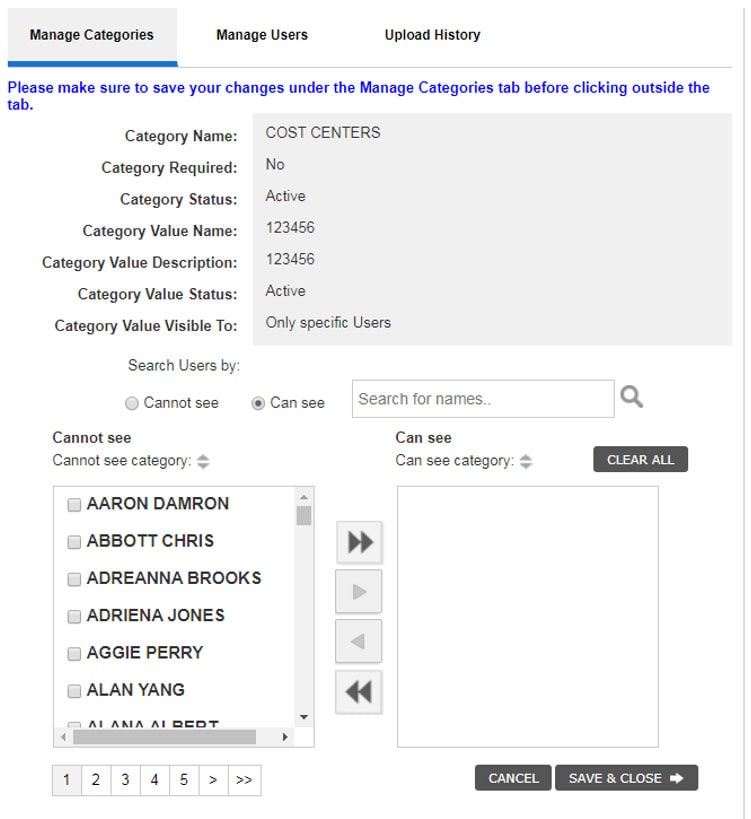
Setting Up Restrictions
Setting up restrictions at the user level is very easy to do. First you want to select the user from the Cannot or Can See listing. Select the box next to their name(s) and use the arrow to move them to the Can See or Cannot see list. Note the page scrolling options under the user listing. select all that apply then click the save and close button.
Setting Up Additional Values for a Category
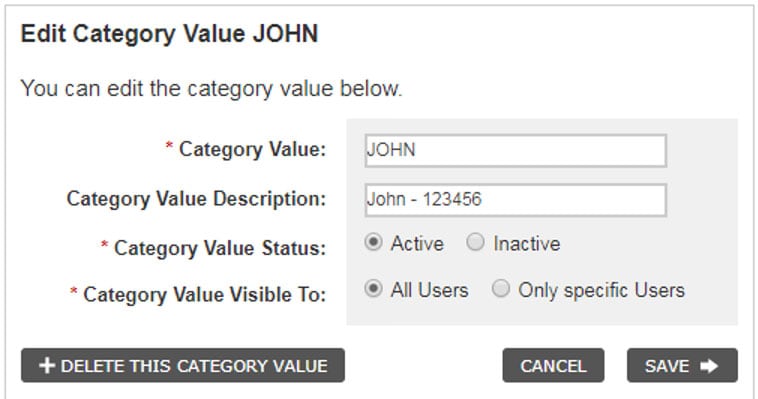
To add additional values to your established categories, select the "Edit" link that corresponds to the category you want to edit.
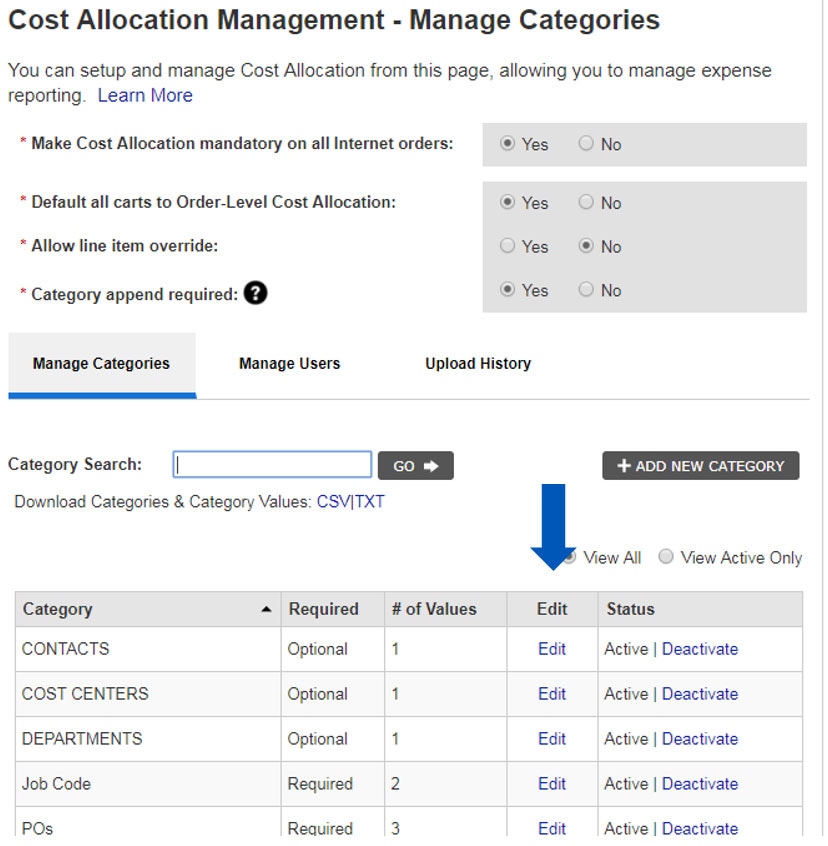
Edit or Add New Category Values
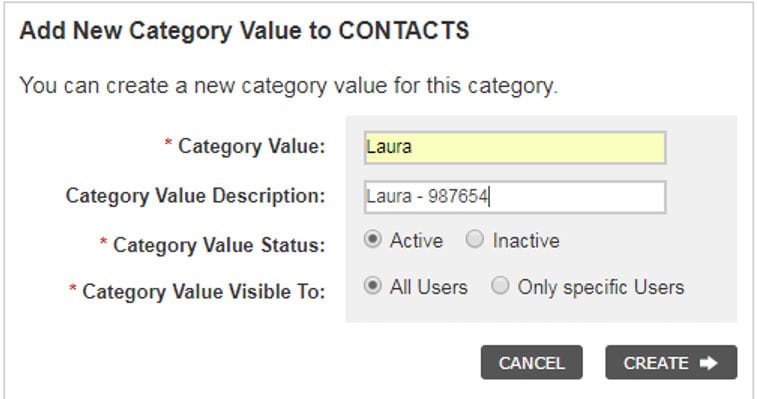
To add additional values to this category, select "Add New Category Value." Add a new value and description. Create the Category Value Status as Active or Inactive and click "Create" to save. Choose if the Category Value will be visible to the user. The form will remain open for you to enter as many values as you would like. When you are finished, close the form by using the X in the upper right corner.
Edit New Category Value
MANAGING USERS
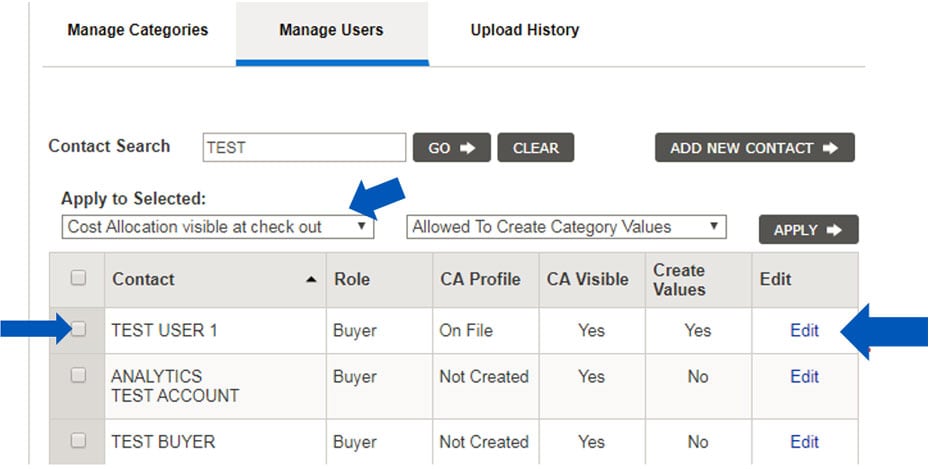
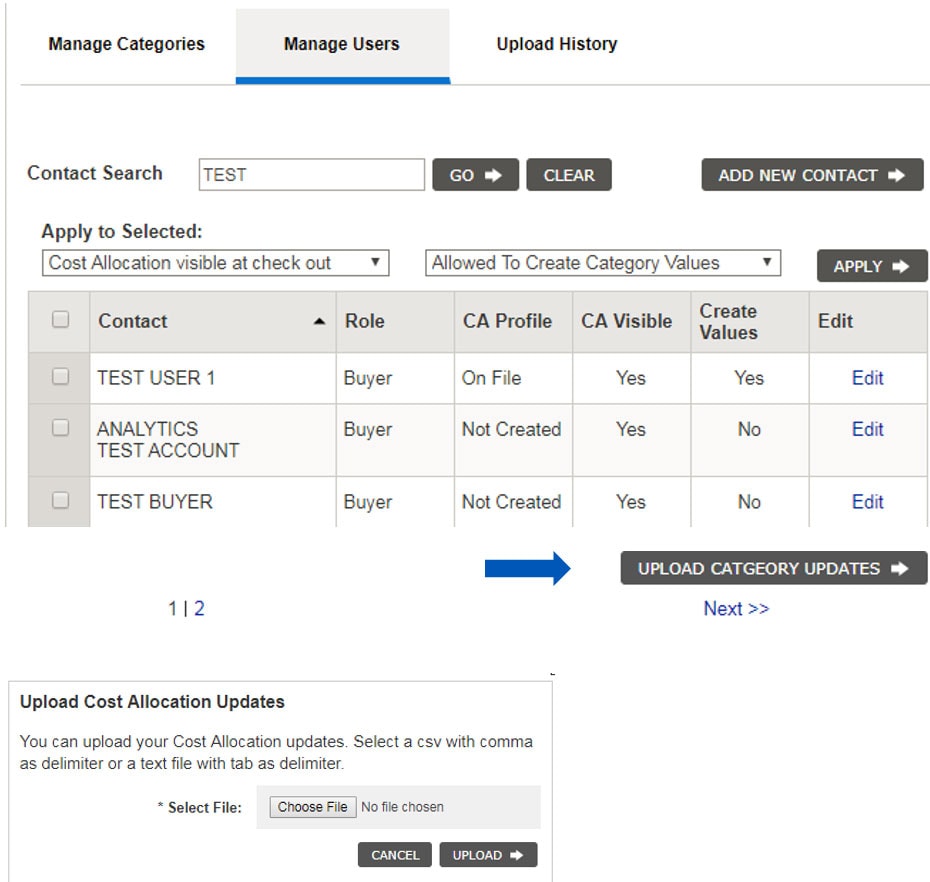
To manage user's select the Manage Users tab. To search for a user, enter their first or last name within the search field. If you want to make updates to multiple contacts at one time, select the check box next to each contact, make your selections from the dropdown menus and click "Apply" to save changes. To make updates to an individual contact, click the "Edit" link that corresponds to the contact you want to update.
EDITING A USER
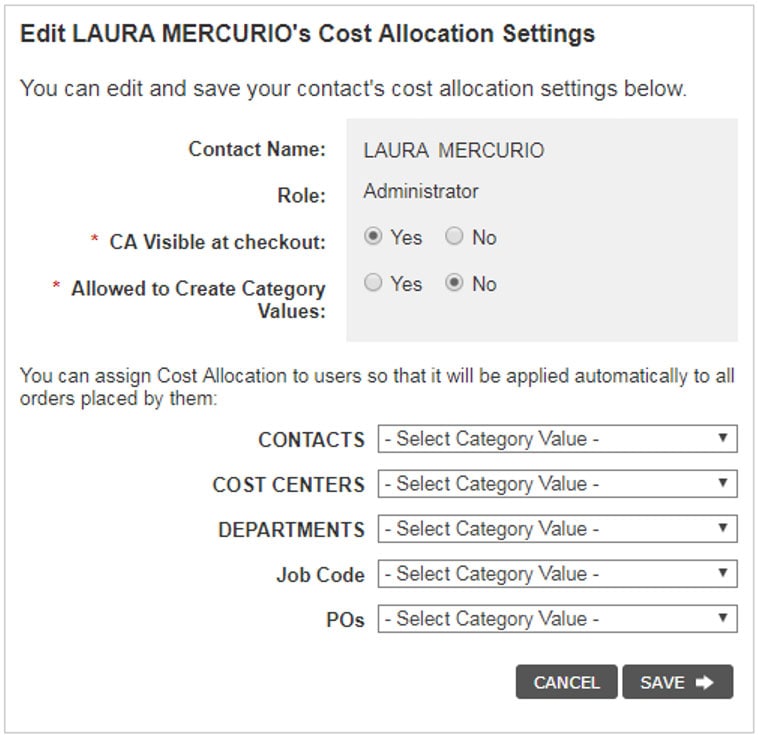
When editing a user you can choose whether or not Cost Allocation is visible to this contact when they are placing an order and if allowed to create category value during the order process. You can also opt to automatically apply certain Cost Allocation default settings to all orders placed by this contact and not allow a user to see options during checkout.
Upload Category Updates
Uploading of categories will provide easy ability for creating user access to specific categories and category values in addition to updates. Simply upload a file created with CVS or TXT format.
Fields include: Category, whether or not it's a required category, the category status (active/inactive), category value, category value description, category value status (active/inactive), category value visibility, web ID, user name, whether or not cost allocation is visible during checkout, and what users can see the cost allocation screen during checkout.
Applying Cost Allocation Settings from the Shopping Cart
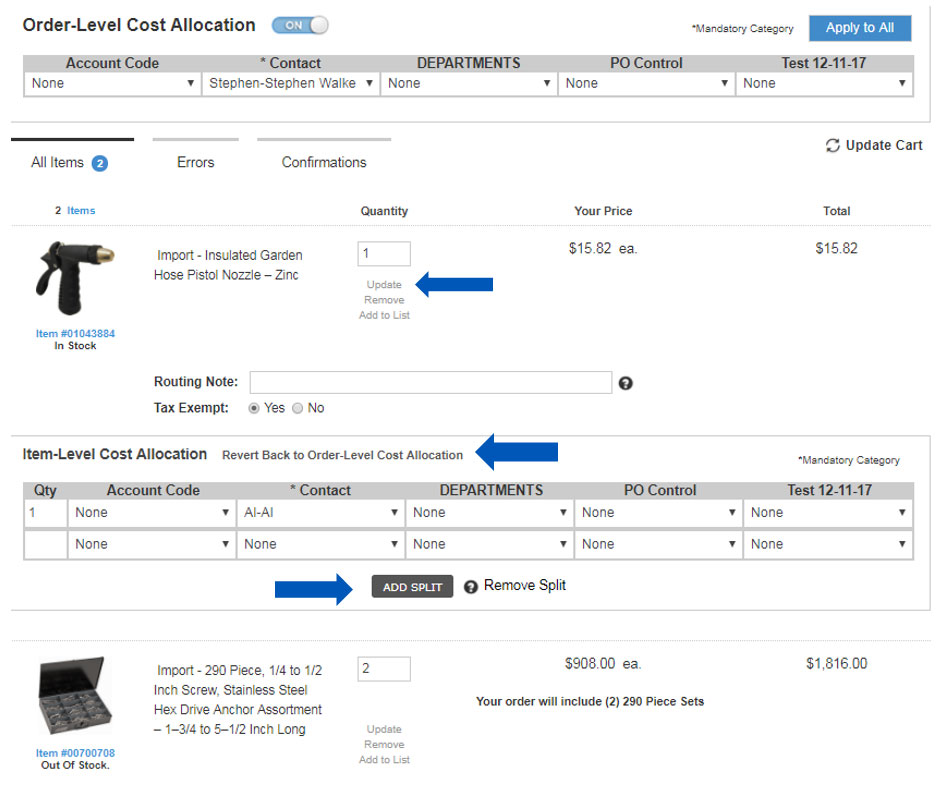
In the shopping cart, you will be able to apply Cost Allocation settings to your entire order (Order Level) or to individual items (Item Level) within your cart.
Order Level Cost Allocation
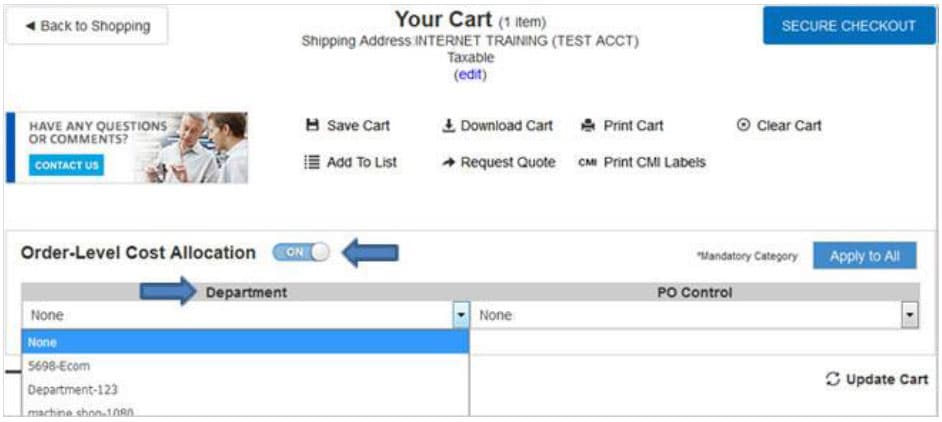
To assign categories and values to your entire order, turn on order level cost allocation by switching the lever to "ON." Select a value from the dropdown and click "Apply to All Items."
Item Level Cost Allocation
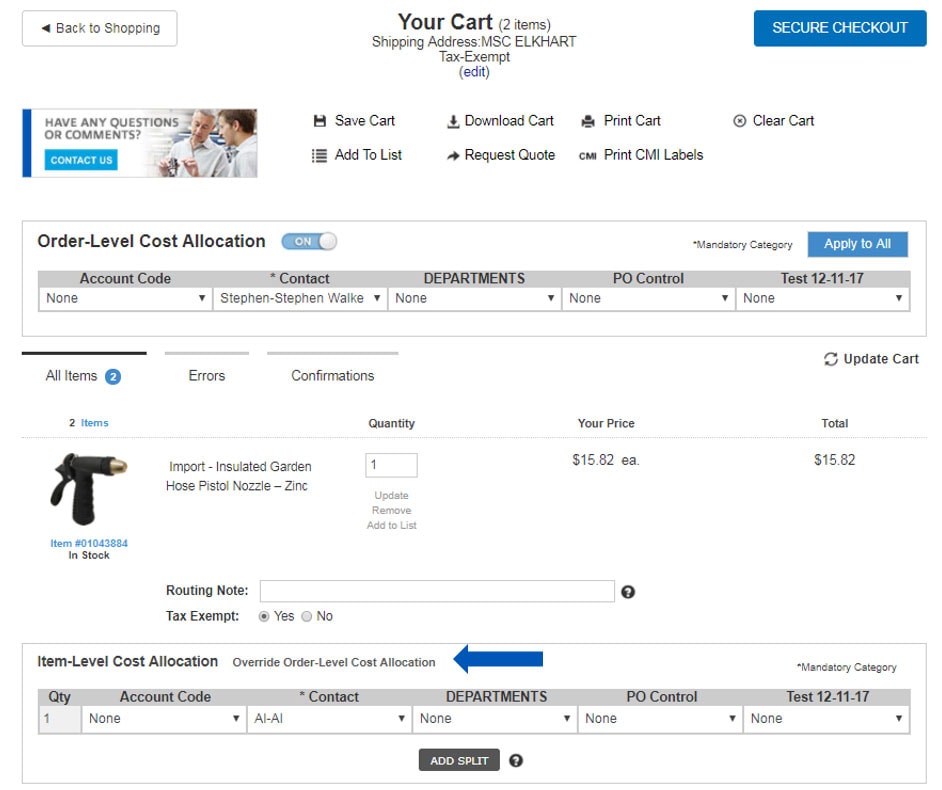
If you would rather apply Cost Allocation to an individual item, scroll to the item level and select "Override Order-Level Cost Allocation." Then apply the appropriate values at the item level. You may also revert to Order Level Cost Allocation at any time.
Applying Split Level Cost Allocation
Within Item Level Cost Allocation, you can split line item allocation to more than one value within the same category. For example, if you are buying 10 anchoring screens and you want to allocate 6 of them to your Manufacturing department and 4 to Facilities. Select the Override Order-Level Cost Allocation and then Click "Add Split," enter the desired quantities, choose the appropriate selection from each dropdown and select "Update Cart."
